party ideas

Enjoy Project | Making Cinnamon Pull-Apart Bread


β€œhow many slams in an old screen door? depends how loud you shut it. 
how many slices in a bread? depends how thin you cut it. 
how much good inside a day? depends how good you live 'em."
shel silverstein 
Photobucket
When it comes to putting something into my mouth, I have three main categories: cheesy, carb-y and soup-y.  My main squeeze, however, has three different categories.  His nutrition heart beats to the rhythm of beef, sweets and sugar. And sweets.  If I fed him a hamburger on plain bread with a cool-glass-of-Coca-Cola! and chocolate cake for dinner every night... well, he'd never leave my company.  But, instead, I make him do crazy things - crazy cultured things and crazy budget things - like pad thai and Crying Tiger pork, and panini's with mustard wine cheese and lemon pepper pasta.  

Here's our issue: I don't like sweets, and I can't bake.  (Come on, when was the last time you had a chocolate fudge bars sprinkled with feta atop fettucine!) My cooking is a creative endeavor like writing or photographing.  It's not HARD LIKE MATH AND SCIENCE AND GRAPHS AND ALGORITHMS AND THOSE BIG FAT CALCULATORS.  People who like baking also probably like sudoku, graphing charts and flash cards. Don't you?  (Actually, don't answer that.  I just tell myself to soothe my soul. "You can't be creative AND bake. Those are the two kinds of people in the world, don't you know?")
Photobucket
I don't bake.  I get clammy.  I start thinking about timed addition tests.  And long division.  There are so many bowls. So so many bowls.  And a lot of white things.  It intimidates me.  "Take this light sand and dark sand, mix it perfectly with goo and you'll have a cake!" I'd much prefer "Take this pasta and this chicken, and you'll have chicken in pasta!" For the sake of my dearest dude, I have tried to incorporate desserts into our menu more often.  I buy cookies on sale.  I bought an ice-cream maker and made awful peach-mint ice cream.  I even attempted a "sooOoo easy" coffee cake and my boy ate one slice. That is bad sign when this Sugar Monster is around.  If something is bad he usually pities me by getting seconds. One slice? Of cake? Ouch.

But guys. Guys.  I made Zoom Yummy's Cinnamon-Pull Apart Bread TWICE. It's truly the easiest thing.  And I'm being very serious when I tell you I followed her directions exactly. 
Photobucket
She says to make a smiley face in the dough. On it.
Photobucket
While you wait for the dough to rise, you can play with other rolls. (Get it? Bah'jing!)
Photobucket
And I waited for the yeast to beat up the happy face.  Like Petra said to.
Photobucket
Now, you can't squelch my inner dreamer and artist forever.  I decided (by choice) to roll my dough into a vision I had: the offspring of a polar bear and a large tortellini.  You'd have to be creative like me to understand.
Photobucket
The shading represents the deep struggle the Polar Bear and the Large Tortellini fought through.  No one thought they'd make it.  (Some of you simpleton's may have thought I just poured too much cinnamon in the corner. Narrow minds.  The light represents hope! And a new dawn! And just ignore the knife... and the 350 degree oven of fire.
Photobucket
Now we need to cut the dough into this handy dandy pull-apart pieces! Petra chose to roll her dough into a neat, long rectangle with rounded corners and she used a ruler (LIKE YOU DO FOR GEOMETRY HOMEWORK.)  When you have a magical eye like I do, you can just eyeball these matters.  Because it IS crucial that these dough squares are perfectly measured. Per. Fect. Lee. Mezj. Erred.
Photobucket
Let's go in for the close up:
Photobucket
Petra has the brilliant idea stack the perfection squares into perfection piles. I like to say that my cinnamon stacks are Monet inspired. 
Photobucket
(See that little dough strip on the middle left of this image? I rolled it around in all the sugar and ate it after I shot this frame.)
Photobucket
I wedged all the bread into the pan like she told me to.  
Photobucket
I also accidentally shot this entire cooking-process in JPEG.  Worst.  This isn't exactly a shoot you can start over... But look at all the dough! Cuddling together like a pack of puppies.
Photobucket
After I cooked the bread I dropped it onto a towel.  And then before the next frame could fire half the loaf was gone.  And I have no more pictures.  But go look at Zoom Yummy's blog!  She took pictures before she ate! 
Photobucket
Can someone who can't bake please try to make this? It would make my life.  And take a picture of the finished product (unlike I did.)  And then send some to my Jay-Z (because I'm his "Beyonce"... get it?)

Enjoy Making Things | Glossy Watercolor Tabletop

β€œin creating, the only hard thing is to begin
a grass-blade's no easier to make than an oak. ”
james russel lowell

Photobucket
Good moooorning, Blog Faaaamily! Thank you so very much for all the kind feedback and general excitement regarding the blog and my latest posts.  It helps me stay motivated to press on!  (What kind of terrible person am I that I could lose motivation after only two days? I don't know.)  But truly, your comments and such bless my heart (said in a Southern Mama Cass voice.)

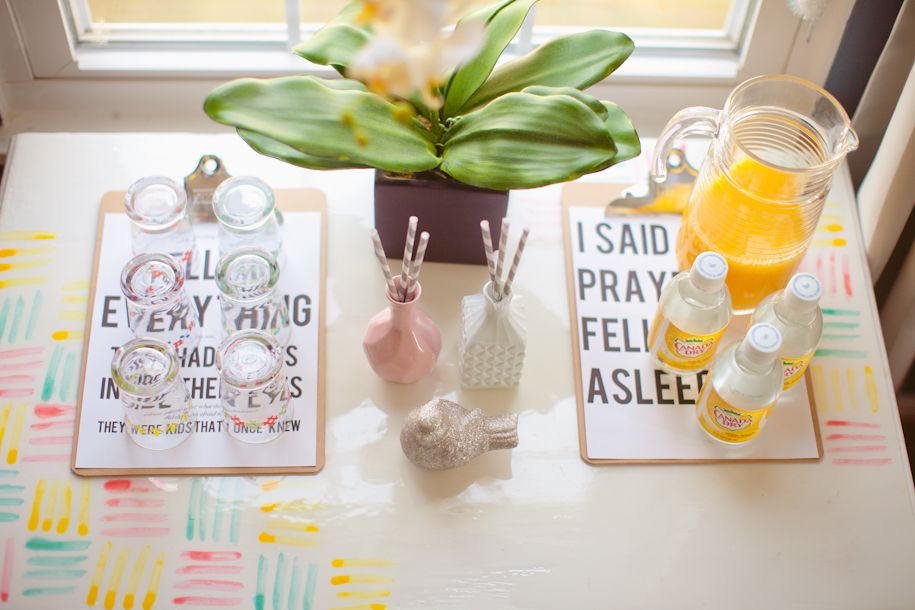
MAKING THINGS! You ready? Today we are making things!  A new glossy, happy, colorful, shiny, fun tabletop to replace a dingy, busted, drab tabletop.

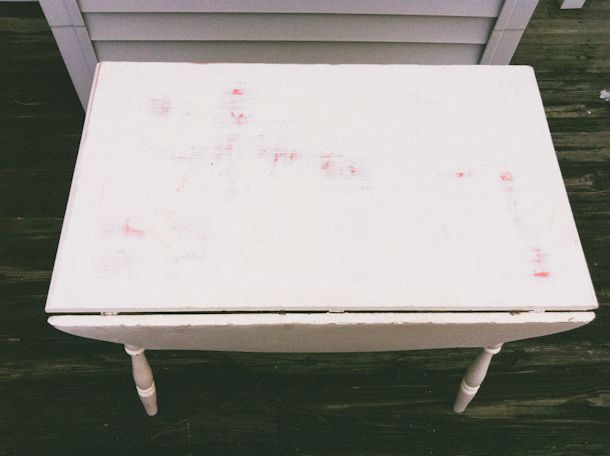
This cute little table is an oddity.  It's perfect for parties, maybe for a breakfast nook... but not much else.  At least that I can come up with.  It's too big to be a side table, to small to be a desk, too cute to be garbage, and too banged up to really, really fix.  If this little guy is going to be mostly used for parties and cute meals, I decided to kick up it's personality a notch. 
Photobucket
I started by sanding down the table top and legs.  Nothing beats that smooth, fresh surface for paint.
Photobucket
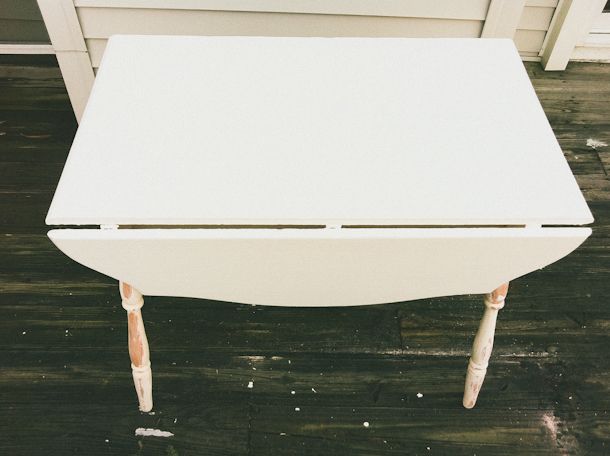
After sanding, Sweet Table received two new coats of bright white matte paint.   This is where the fun begins.  All the other stuff is boring and mandatory.  Now we get to add some cuh-lllllah!
Photobucket
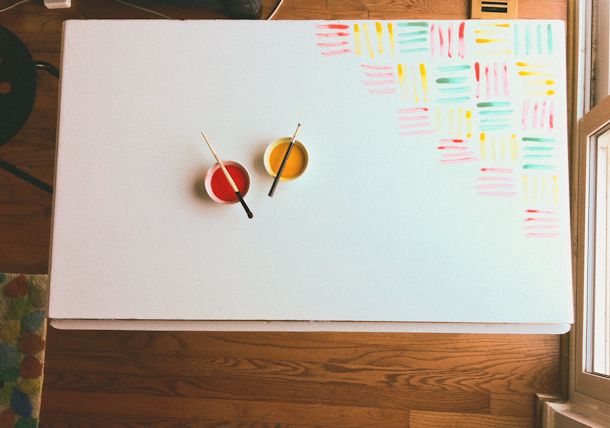
I googled around for a homemade watercolor paint recipe.  The one I used is as easy as they come: mix together three tablespoons of baking soda, three tablespoons of corn starch, three tablespoons white vinegar, and 1.5 teaspoons corn syrup.  When fizzing stops, separate into containers, add drops food coloring and wa-la! You have made your own inexpensive paint!
Photobucket
The paint is a little but gritty, which worked perfectly for this project because it seemed to settle into the wood and not slide around on top.  It probably wouldn't be the best watercolor to use on paper (I'm only guessing though). 
Photobucket
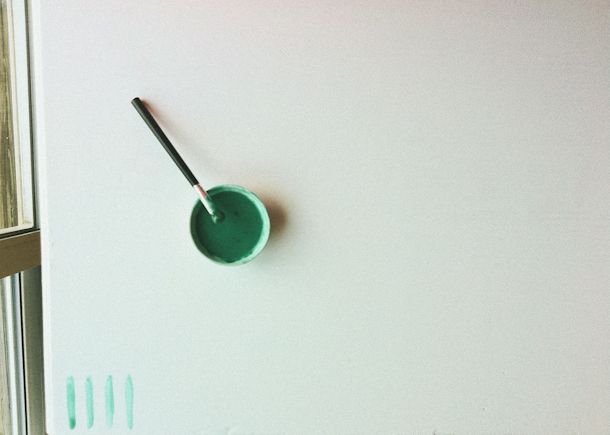
Before I began painting I had already planned what I wanted to do: a colorful thatched pattern!  I definitely wanted it to be "imperfect" and casual.  That look was also easier then making it perfect and very straight.  I love it when my design taste and laziness work together ;) (ps.  I painted with eye-shadow brushes! They cleaned up just fine when I was done.)
Photobucket
The next step to the project was adding an epoxy glaze on the tabletop (I used this brand... and it was $10 cheaper at my local Home Depot!  And I used about 1/3 of the product for this table).  I didn't want the white matte paint to scratch or the watercolor to peel off, so after so research I ended on the hard plastic glaze look.  It'll be easy to clean and I think gives the old table a bit of a modern edge - kind of like those snazzy clear lucite chairs? Hey? (Don't you like my lackluster photography job? I poured the glaze at night, my iphone was right there... I caved to temptation.)
Photobucket
After I let it dry overnight, I had a fun new table!  I decided to give Sweet Table some props... maybe for a small ladies breakfast? This is, after all, the perfect party and breakfast table! I've never seen such a cute mimosa bar ;)
Photobucket
Photobucket

Photobucket
Photobucket
Photobucket
Photobucket
Photobucket
Photobucket
Photobucket
Photobucket
Make sure you let everything dry really well!  I did this project over a couple of days, one little step at a time.  Fresh white paint: dried over night.  Watercolor paint: dried overnight.  Glaze: dried over night.  I would love to try this with other objects! Maybe wooden frames or shelves?  I simply adore the shine and the color! You think you'd ever give this idea a whirl? :D